
Before you start
Open Fellix and Claude. You need an account in each and an eligible Fellix organization. Fellix has applied to be listed in Claude’s connector directory. Until it is listed, add it as a custom connector as below. On a Team or Enterprise plan, an owner of the Claude organization adds the connector under Organization settings → Connectors; each person then presses Connect and signs in as themselves.
Steps
- In Claude, open Customize → Connectors → Add → Add custom connector.
-
Enter Fellix as the name and
https://api.fellix.ai/mcpas the URL, then select Continue.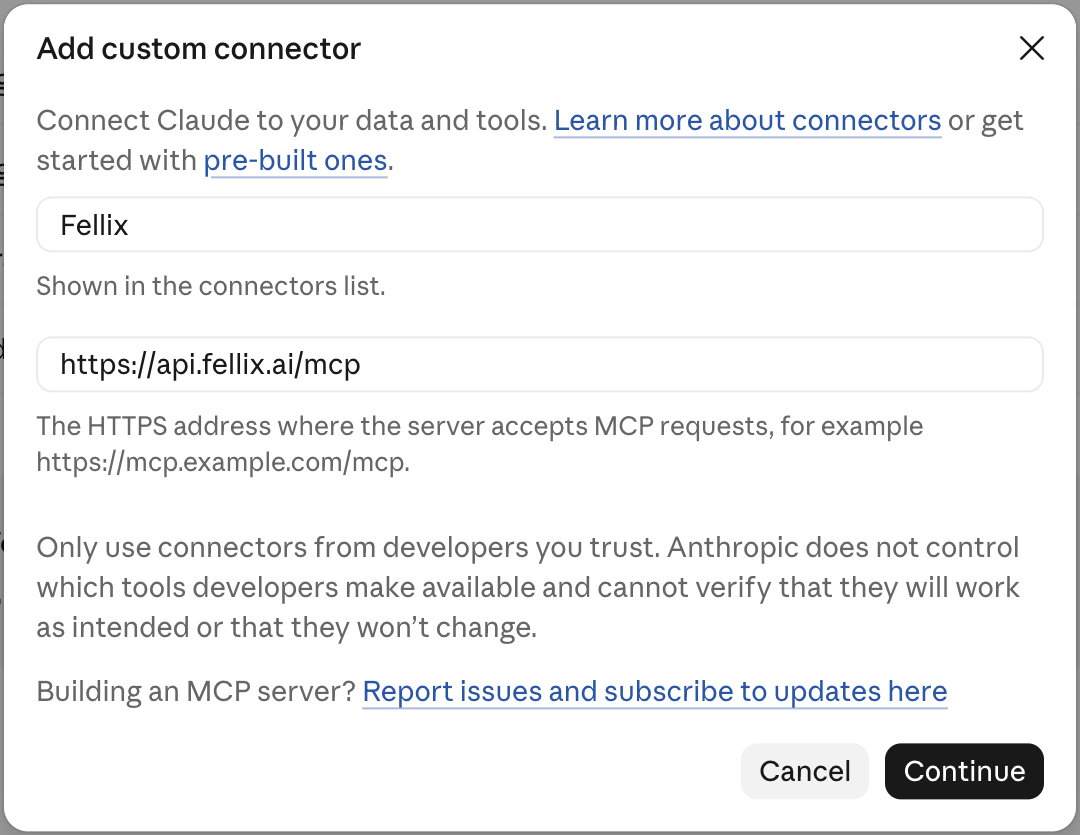
Claude’s Add custom connector form for Fellix. -
Sign in to Fellix. Choose an Organization and
review Permissions.
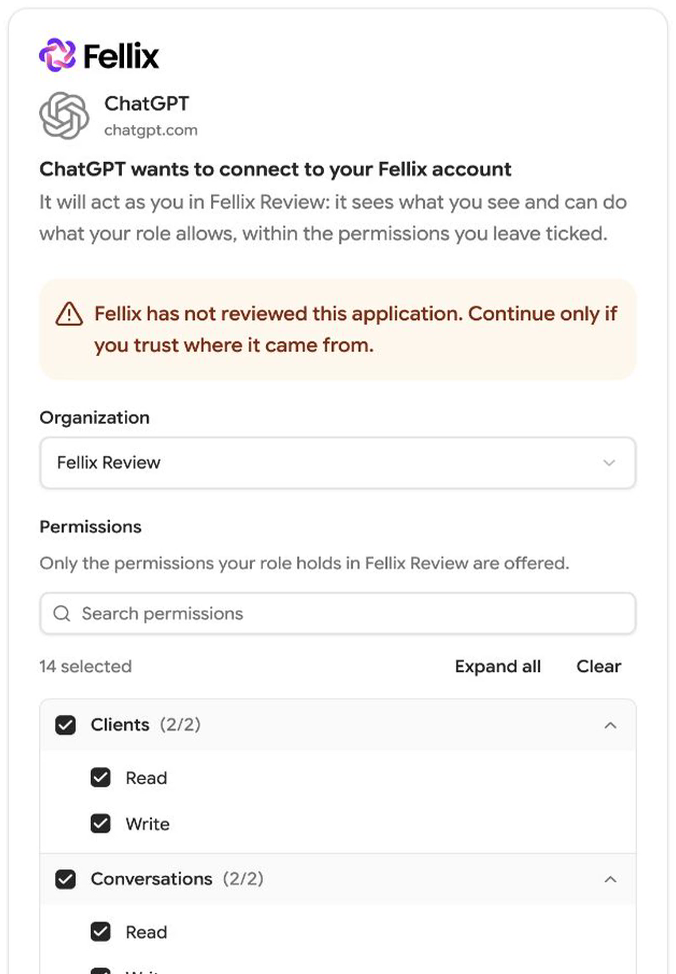
Fellix’s consent page (shown here for ChatGPT; it names your assistant) -
Leave the permissions you need ticked, then select
Authorize.
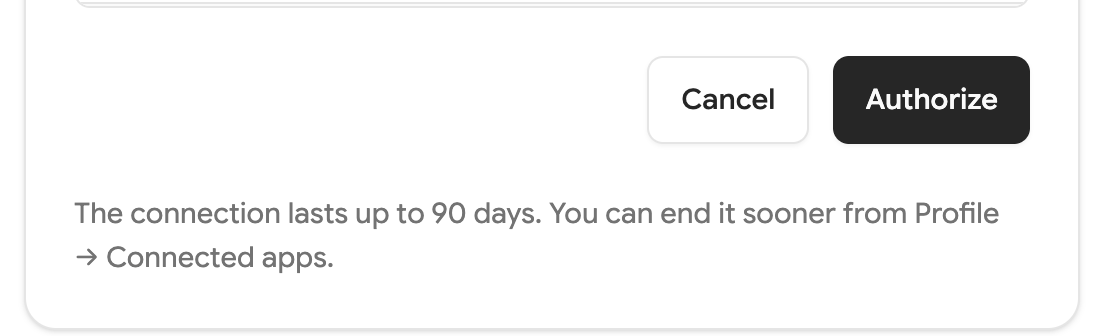
Fellix’s consent page: review the connection duration and select Authorize.
Choosing the organization
Choose the organization on the consent page. Organizations where your role can grant nothing are not listed. Each connection is limited to the organization you select.
Permissions
The consent page groups permissions as Read and Write by resource. The assistant is limited by both your role and the permissions you approve; review the choices before authorizing. The assistant’s own settings determine whether it asks before a write action.
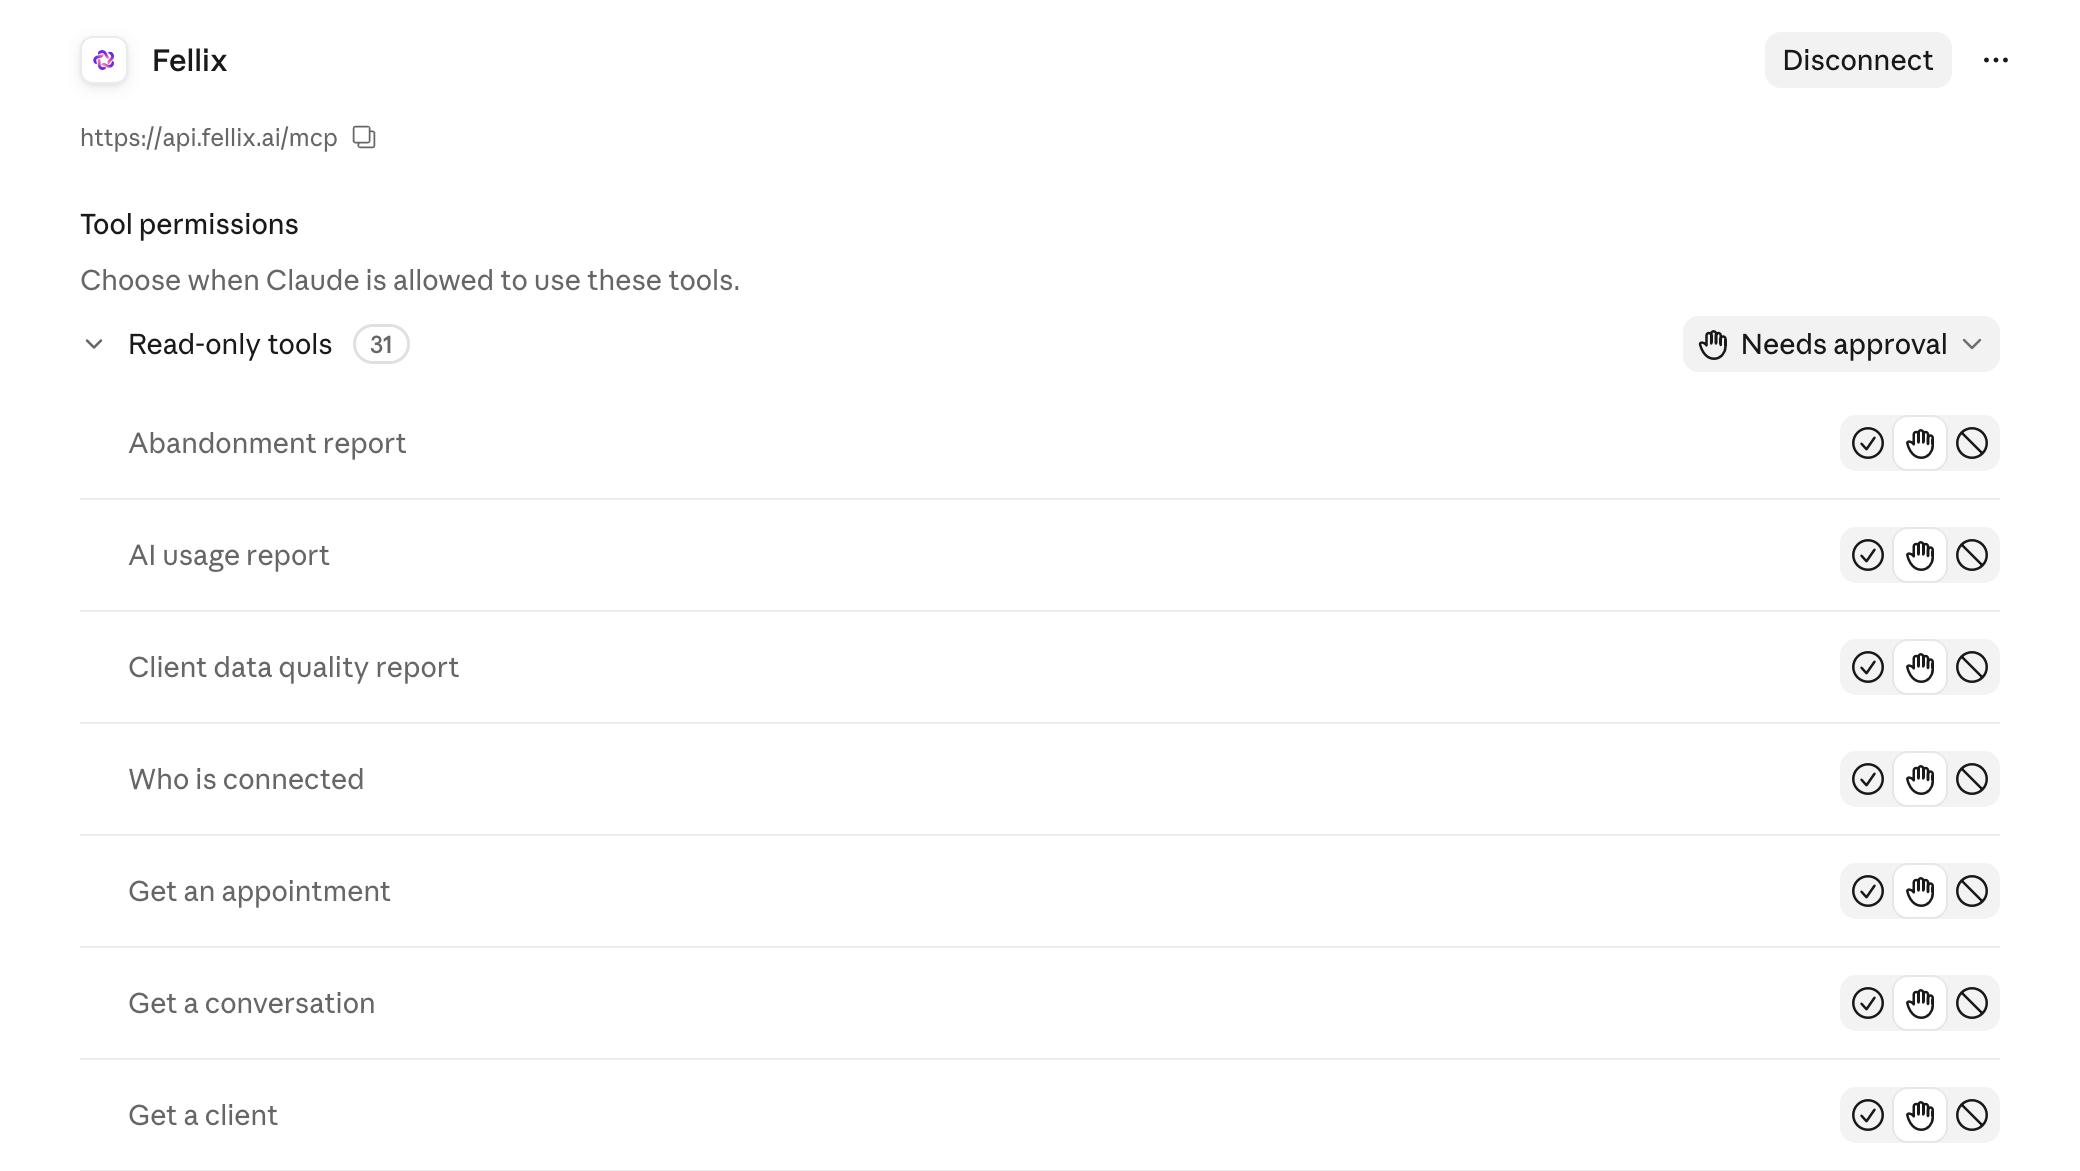
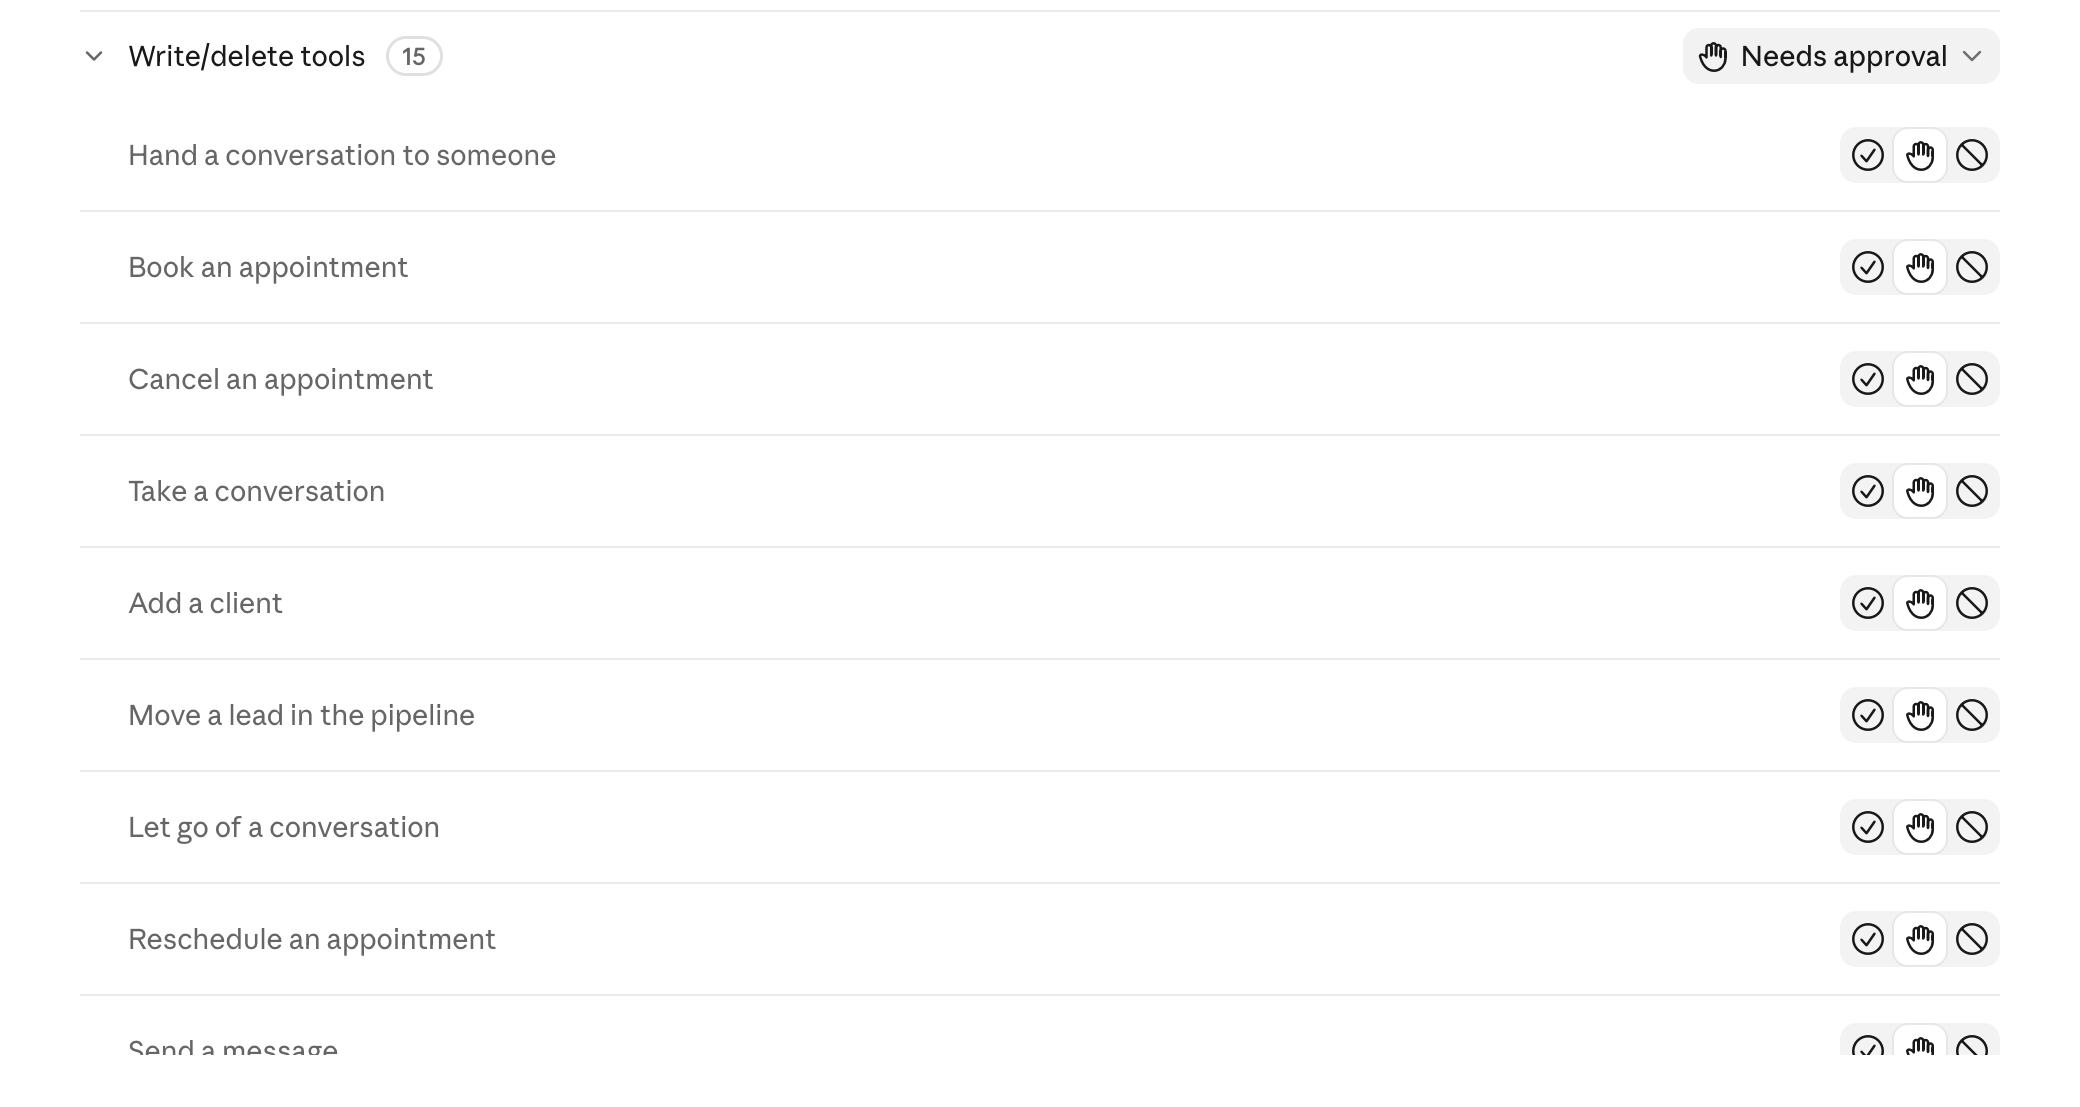
In Claude, open Customize → Connectors → Fellix → Tool permissions. Set Read-only tools (31) and Write/delete tools (15) separately to Always allow, Needs approval, or Never. Whether Claude asks before a write action follows these settings and the chat’s own permission mode.
What it can do
“Which Fellix organization am I connected to, and as whom? Then list my next three appointments.”
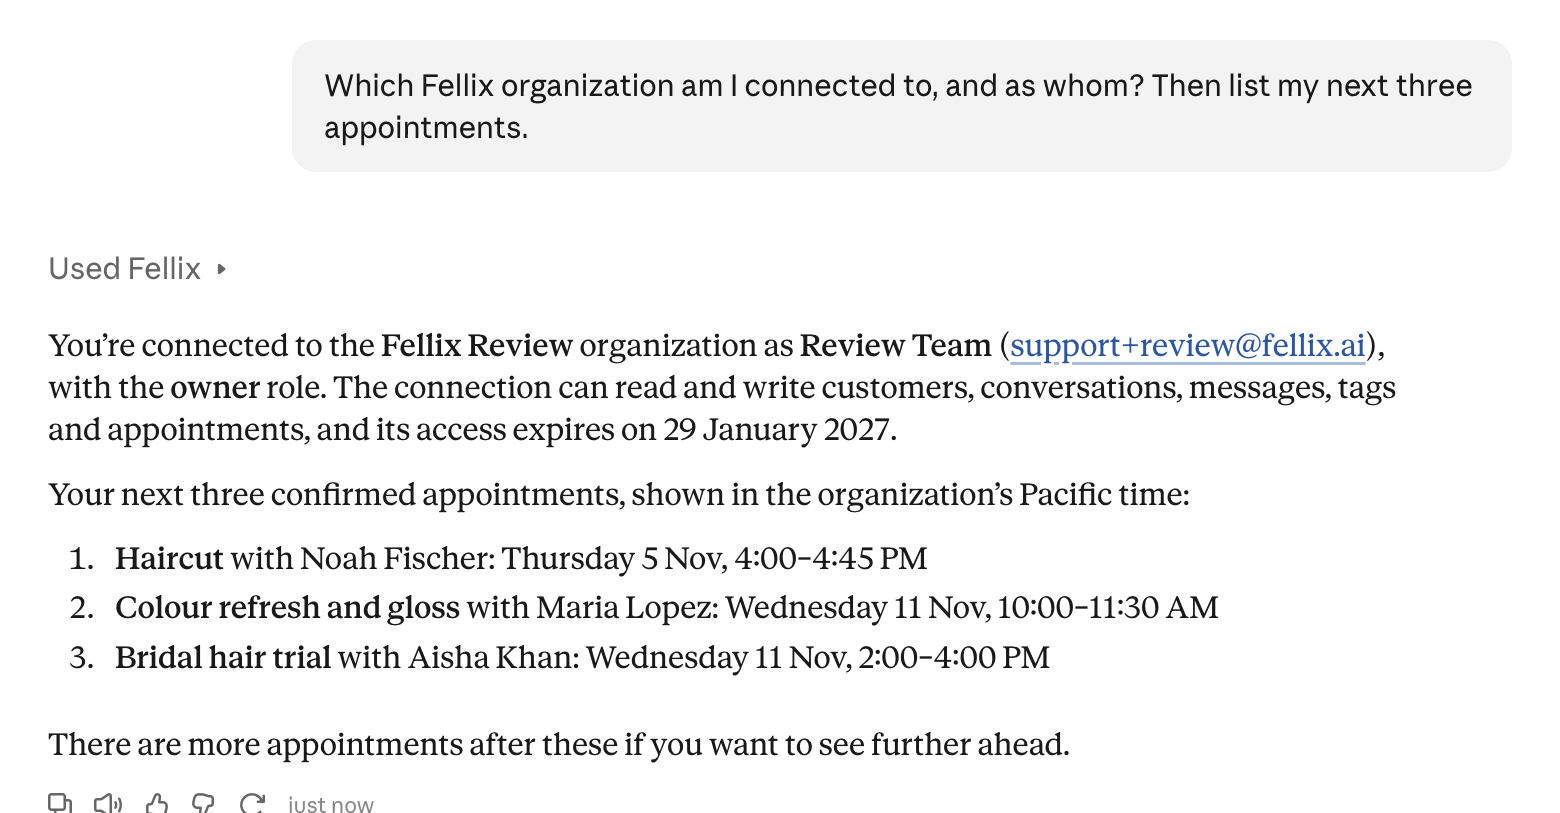
Claude identifies the connection and lists the appointments.
Where your assistant shows MCP prompts, these three ready-made prompts appear there:
- Inbox briefing — What moved in the Fellix inbox lately and what needs a person, without changing anything.
- Follow up warm leads — Open hot and warm leads that have gone quiet, with a drafted follow-up for each, sent only once you approve.
- Today's appointments — The day's appointments in the organization's time zone, with what still needs confirming.
What it will not do
No tool charges a card or takes payments. Conversation access is limited to web chat, WhatsApp, Instagram and Messenger through channels your organization has connected. A WhatsApp message cannot be sent when the organization has no WhatsApp channel.
Good to know
- Everything the assistant sends goes out under your name, as if you had sent it.
- A connection lasts up to 90 days and ends sooner if unused for 30 days. Connect again when it ends.
- You can have at most 10 connected apps per person per organization.
- Each connection is for one organization. To switch, disconnect and connect again, choosing the other organization.
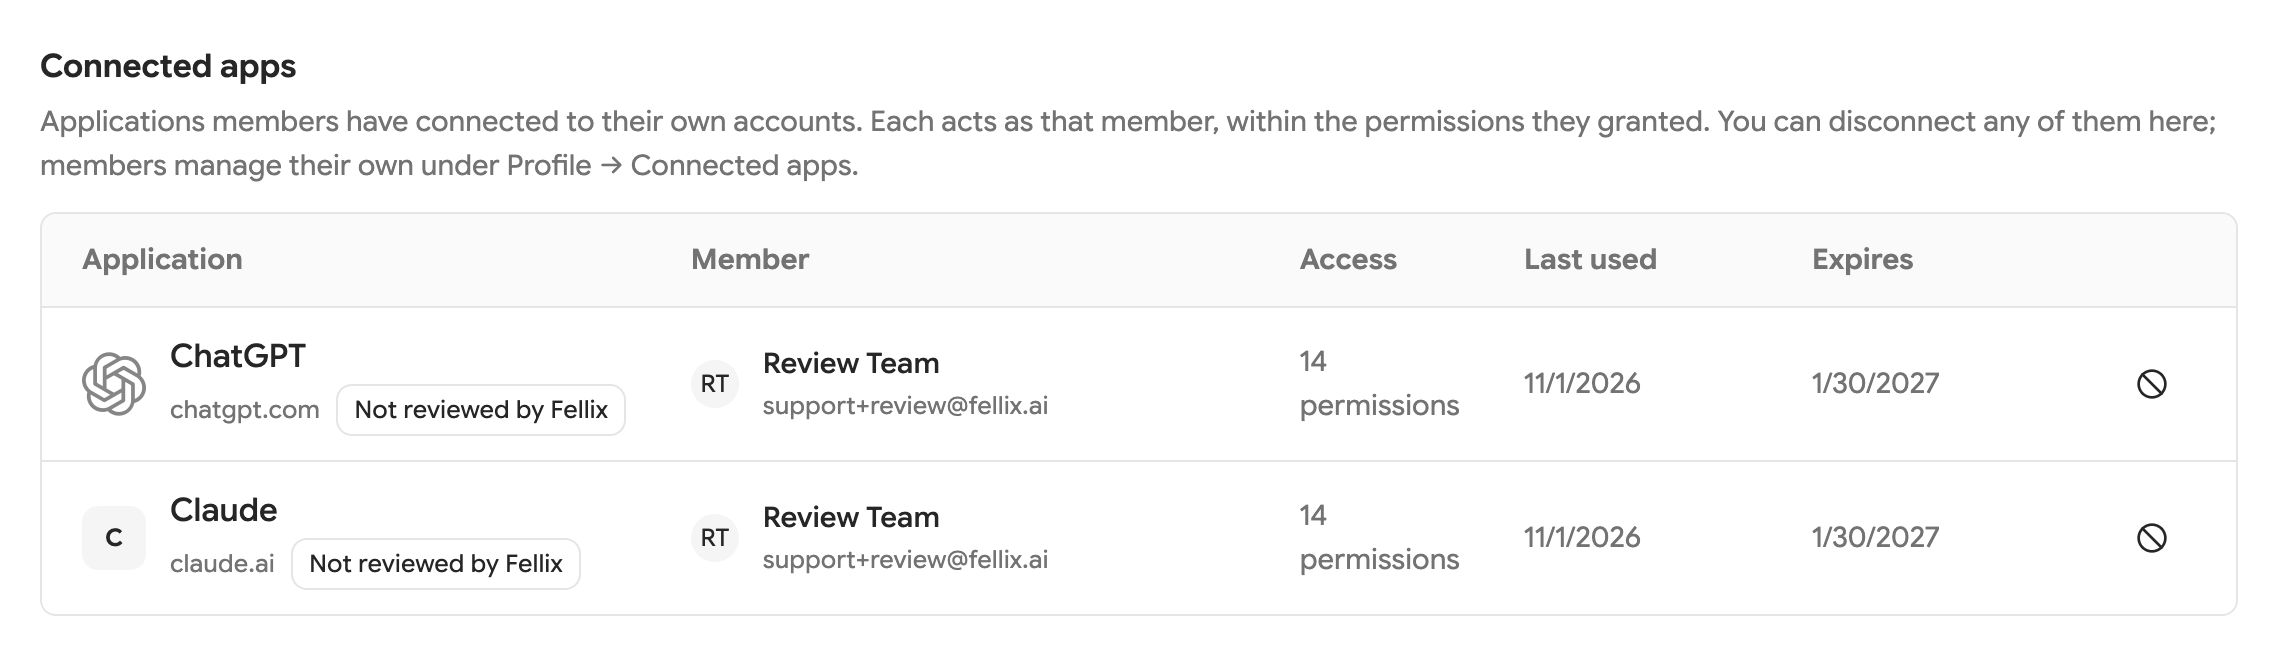
- The yellow “Fellix has not reviewed this application” note is expected for assistants Fellix has not marked as reviewed.
Disconnecting
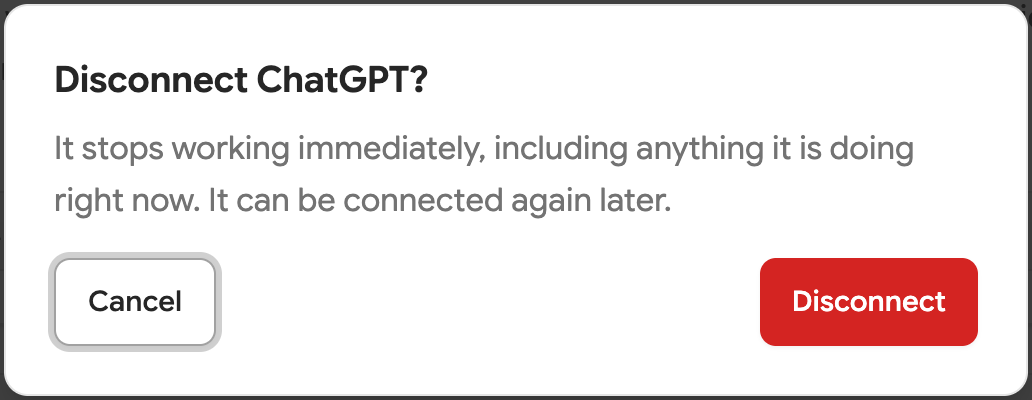
In Fellix, open Account Settings → Connected apps, select Disconnect for the connection, and confirm.
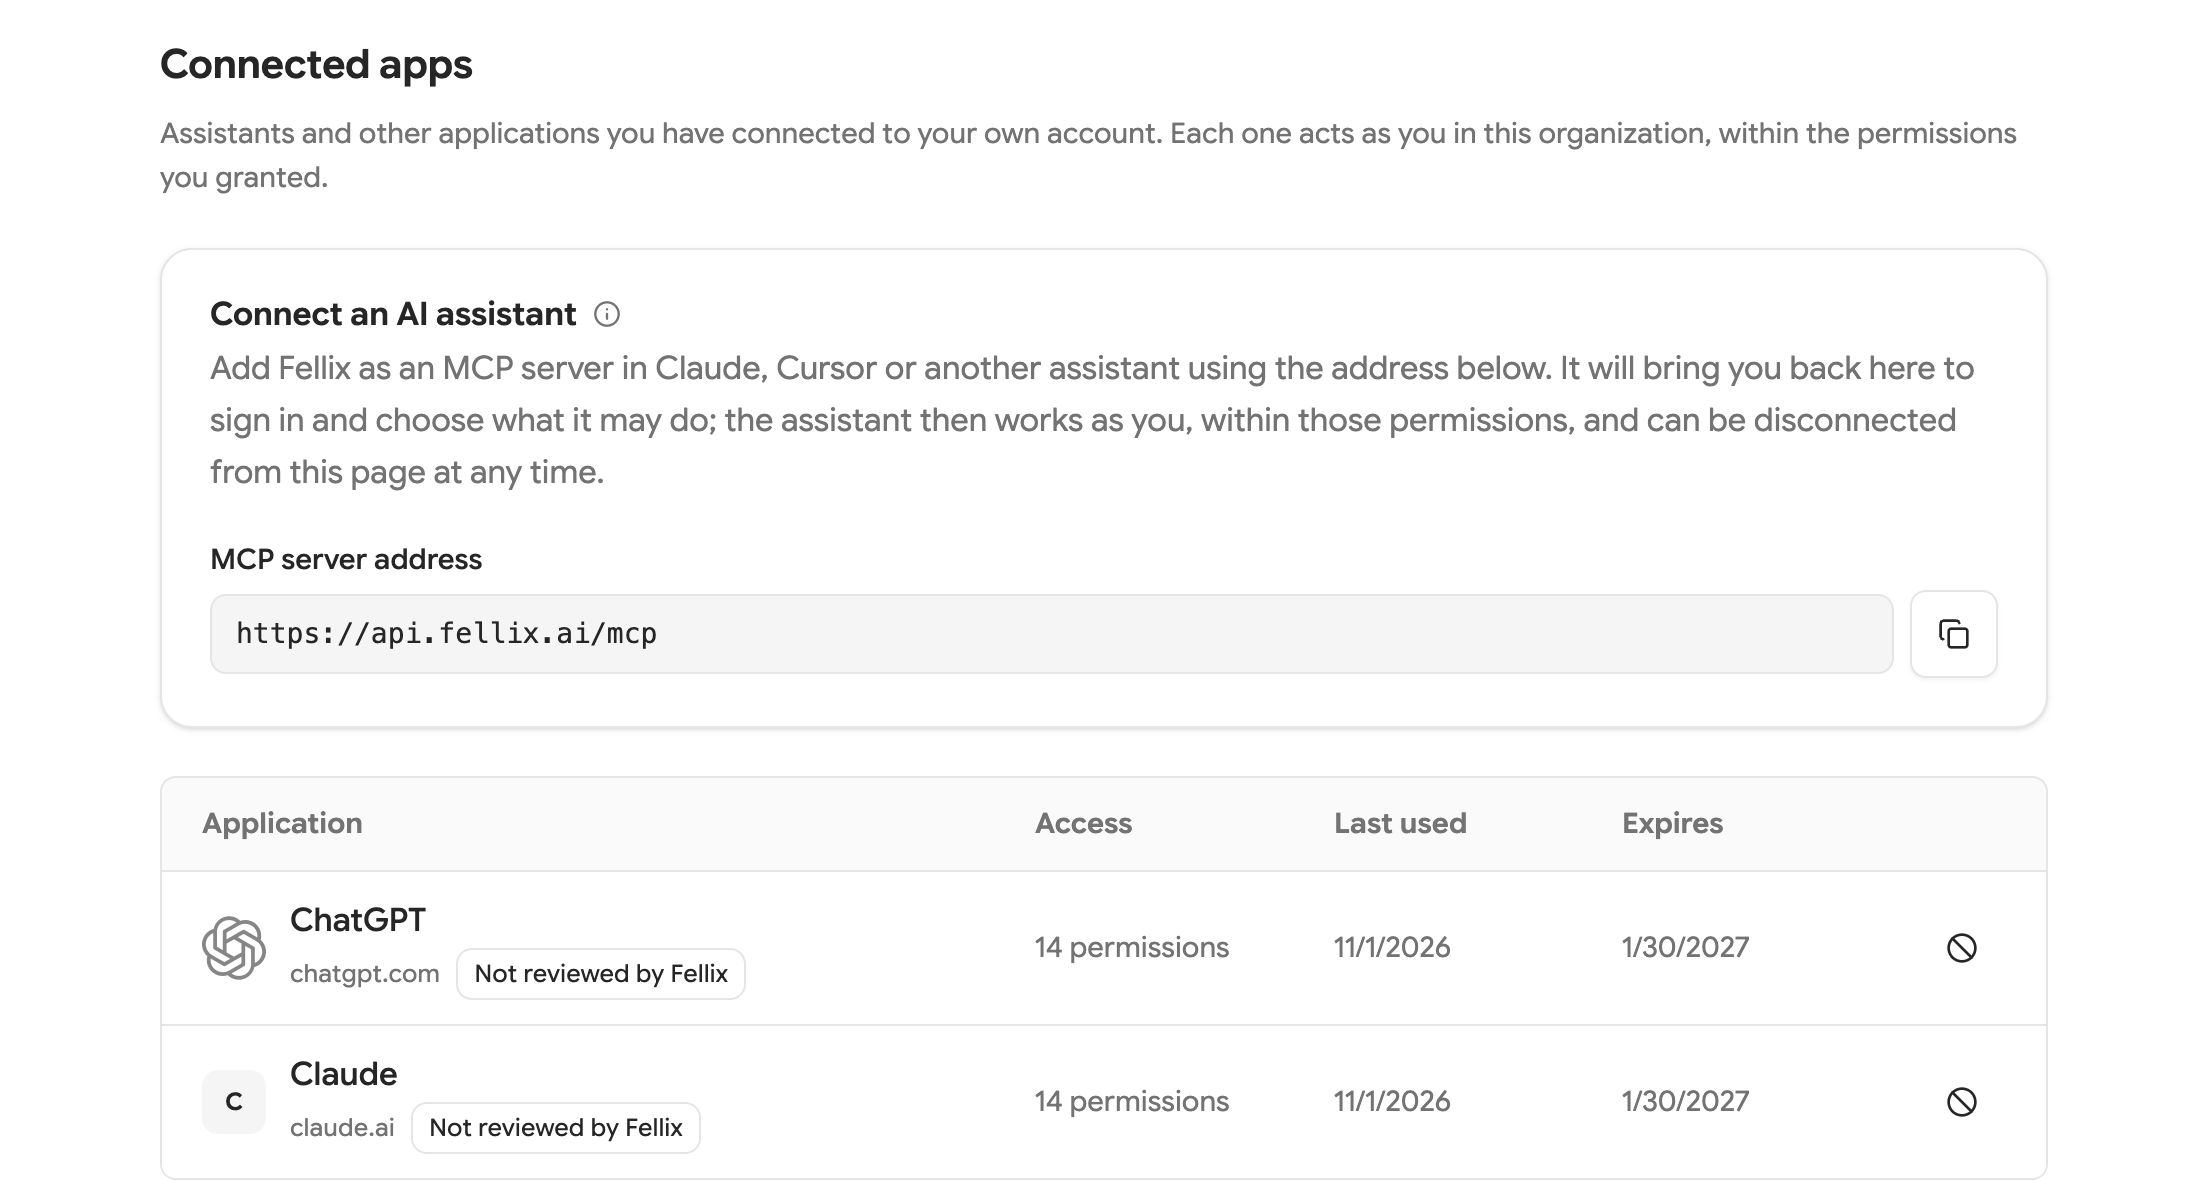
The organization owner can disconnect any member’s connection under Settings → API keys → Connected apps.
Troubleshooting
- “Organizations where your role can grant nothing are not listed.” Ask an owner to review your role in the organization.
- “Your role cannot grant anything in any of your organizations, so there is nothing to connect.” Ask an owner to review your role.
- “This authorization request is not valid” The application or return address was not recognized. Go back to the assistant and start again.
- “That authorization could not be completed. Try again.” Return to the assistant and start the connection again.
- “You already have 10 connected apps in this organization. Disconnect one under Account Settings → Connected apps and try again.” Disconnect a connection you no longer need, then try again.
- “This refresh token is no longer valid: it was already used, it expired, or the connection was ended. Authorize the connection again.” Start the connection and authorize again.
- “This credential does not have the [scope] scope.” Disconnect and connect again with the required permission ticked.
- “Your role in this organization cannot do this in Fellix, so an assistant acting as you cannot either. An owner can change your role.” Ask an owner to review your role.
Reference
See the MCP developer reference for all tools, permissions and protocol details.